
Setting up a react application with routing, context management and error handling


React is a popular JavaScript library for building user interfaces, and it's often used in combination with other libraries and tools to build complex web applications. One such combination is using React with routing, context management, and error handling.
In this article, we'll go over how to set up a new React application, and then add routing, context management, and error handling to it.
Setting up a new React application
To get started, we'll use the create-react-app command-line tool to create a new React application. This tool sets up a basic project structure with some common development tools and libraries already configured.
First, make sure you have Node.js and the create-react-app tool installed on your computer. Then, open a terminal and run the following command:
npx create-react-app my-app
cd my-app
npm start
This will start the react server on your web browser
Adding routing
Next, we'll add routing to the application. Routing allows us to define different URLs for different parts of the application, and display different components based on the current URL. For this, we can use a library like react-router-dom.
To add react-router-dom to the application, we need to run the following command in the terminal:
npm install react-router-dom
Once it's installed, we can start using it in our application.
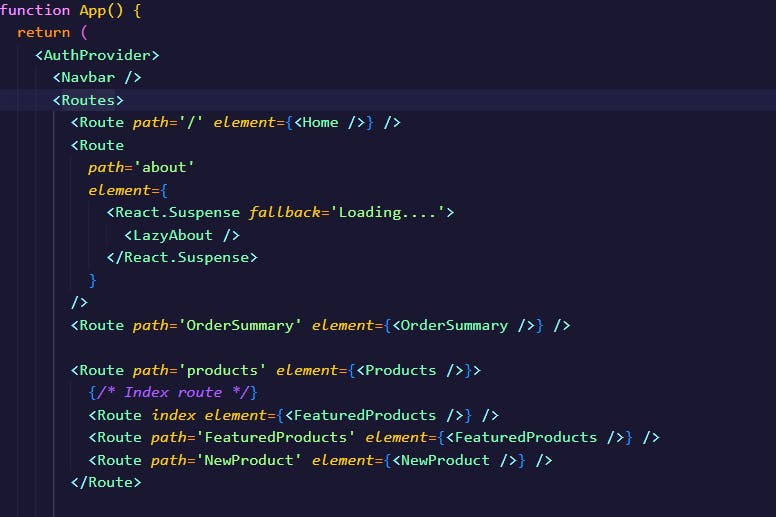
In the src folder, create a routes folder and in it create a index.js file. Here, we'll define our routes and the components that should be displayed for each route.
Adding context management
Context management allows us to share data across different parts of the application without having to pass the data down through props. We can use the `React.create
ContextAPI to create a context and theuseContext` hook to access the data in our components.
First, we need to create a new file in the src folder called context.js, where we'll define our context.
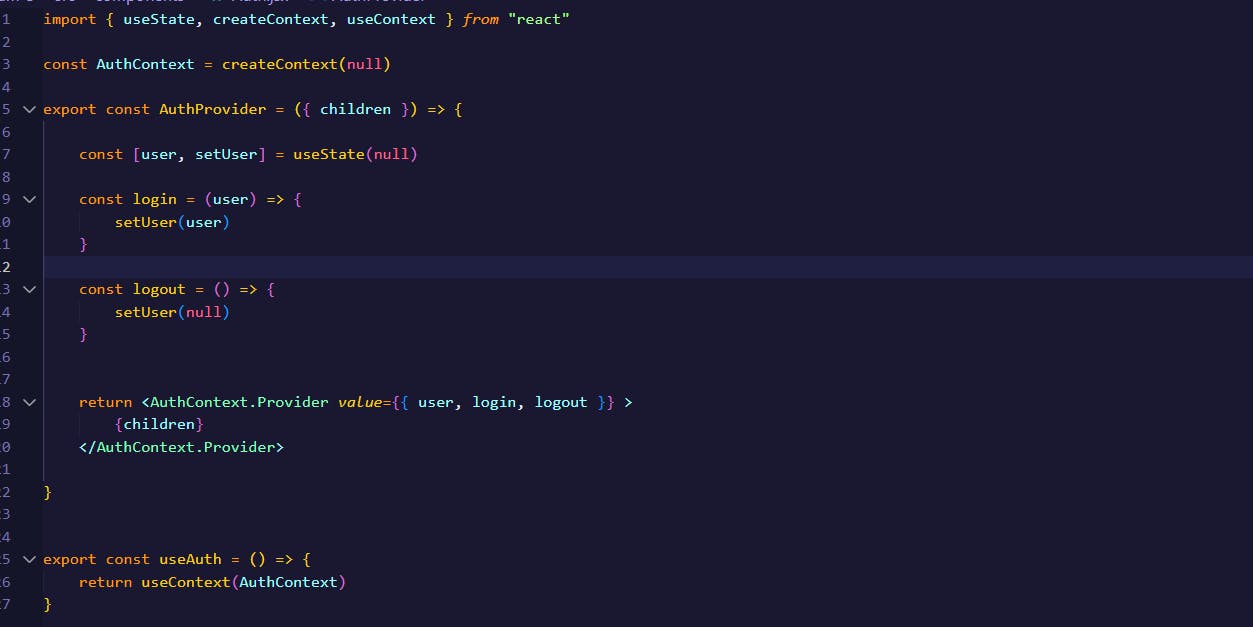
Then we wrap the root component with the context provider, Now, in any component that needs to access the context, we can use the useContext hook to retrieve the value from the provider.
Adding error handling
Error handling is an important part of any application, and React provides some built-in features to help you handle errors in your code. One of the most commonly used features is the componentDidCatch lifecycle method, which allows you to handle errors that occur in a component's children.
We can create a new component called ErrorBoundary that will wrap our application's root component and handle errors that occur in any of its children.
import React, { Component } from 'react';

class ErrorBoundary extends Component {
  state = { error: null, errorInfo: null };

  componentDidCatch(error, errorInfo) {
    this.setState({
      error: error,
      errorInfo: errorInfo
    });
  }

  render() {
    if (this.state.error) {
      return (
        <div>
          <h2>Something went wrong.</h2>
          <details style={{ whiteSpace: 'pre-wrap' }}>
            {this.state.error && this.state.error.toString()}
            <br />
            {this.state.errorInfo.componentStack}
          </details>
        </div>
      );
    }
    return this.props.children;
  }
}
Then we can use this component to wrap the root component of our application.
Conclusion
Thank you for reading this article, it helped me understand concepts in a better way and sharpened my react skills.